Quick and dirty background video
Background video is a useful tool in a web designers toolkit. I’ll show you how quick and easy it is to pull together. You can see it on a whole swathe of websites now — probably (in part) due to technological reasons. It’s easier to code it up and it’s widely supported by browsers.
There are some downsides though. The biggest is that videos are still likely to be the largest files that you include in your web pages. And big files take longer to download. As part of the Falmouth University website overhaul, we helped them to compress video for their homepage using the following techniques.

Back to that technology bit for a second: With the advent of the <video> tag in HTML5 you can embed videos ‘natively’. And one of the properties that you can set on that tag tells the browser to start downloading the video when the page loads or only when the user presses play. So you could defer the load, but if it’s a background video you’re interested in, I’m betting you want that video to autoplay on page load? In that case, we have two options. The first is to use a streaming format. We’ve begun to experiment with this and will be launching a project later this year with MPEG-Dash support. If you’ve ever wondered how Netflix loads your favourite shows so quickly — it’s because they use similar technology to Dash. This is a great solution if you have time and budget on your side.
Oh wait, you don’t have time or budget on your side? Don’t panic.
Back to basics
Just like all other assets the trick is to keep file sizes small. But that has to be balanced with the quality of the output. Simplistically, the smaller the file size, the lower the quality. But there’s actually a whole bunch of stuff assides from the moving images in a video that add to the file size. Jettesoning the right data can give you a significantly smaller file size without a significant compromise in quality.
I always tell our clients this, which gets passed onto a video unit, but I’m left thinking that the files delivered could still be smaller. Typically we get stuff that’s been compressed to 30–50mb. But even this is too big. So we end up doing another pass of encoding.
After years of tinkering, we think we’ve found a balance that acts as a perfect starting point. And best of all you can do it yourself with a single free Mac app. Using my preset I can drop a 100mb file down to under 2mb. It’s not perfect, but without budgets and timelines, this approach with minor compromises is the next best thing.
Go ahead and get yourself the wonderful HandBrake. The app icon is u-g-l-y and the interface isn’t exactly going to win any design awards, but it gets the job done better than most.

Step one: Your video
Your video probably shouldnt have any text in in. That means no credits or logos either. Keep it as short as possible. Background video is a replacement for an image, to supplement your message. You should be able to do this in 10 seconds or less. It’s possible to do longer, but ask yourself, “can I do this in less frames?”
Step two: Format
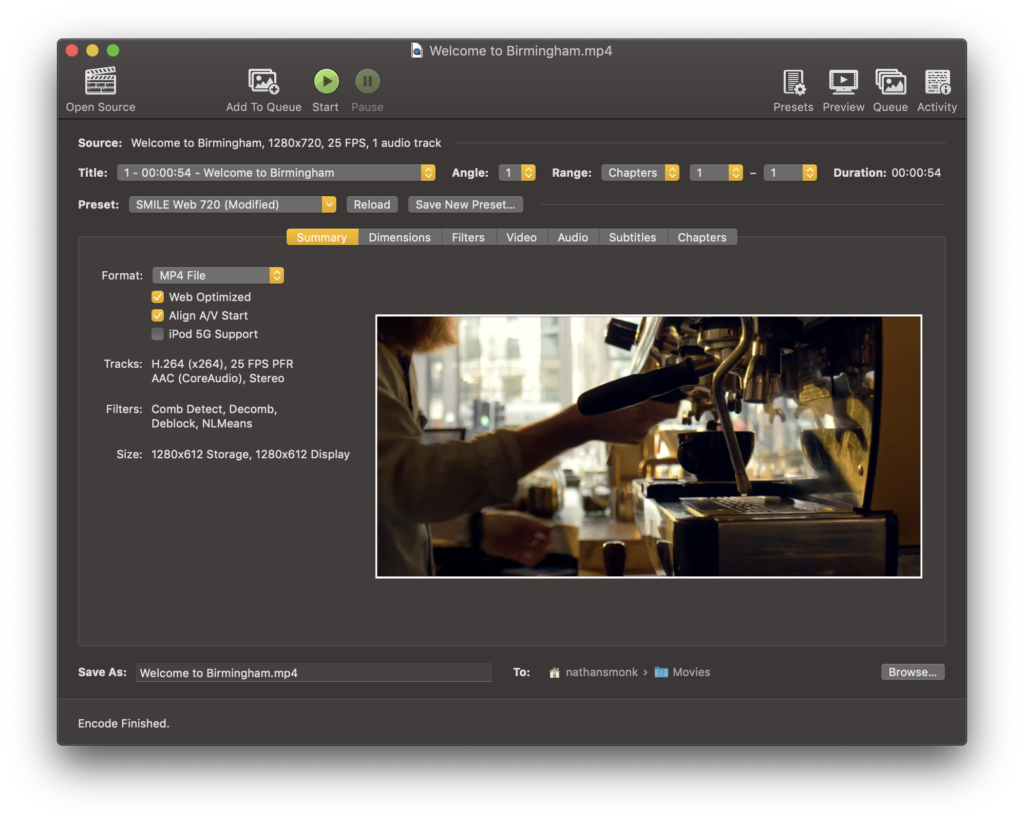
MP4, no brainer. You basically don’t need another format it’s so well accepted. It should cover more than 80% of your audience.
Step three: Resolution
If you’ve got black bars, lose ’em. You’re going to want to downsample to 720p too, and then, if you’re really feeling brave, you should crop it to a square. If you’re interested in why, then you you read more on my thoughts about why squares are the best storage ratio for responsive assets.
Step four: Filters
I’ll be honest, I don’t understand how these work. I’m sure there are some boffins out there that can tell you all about them but from what I understand, they control things that are basically imperceptible to the eye unless your are trained to look for it.
Step five: Video Rendering

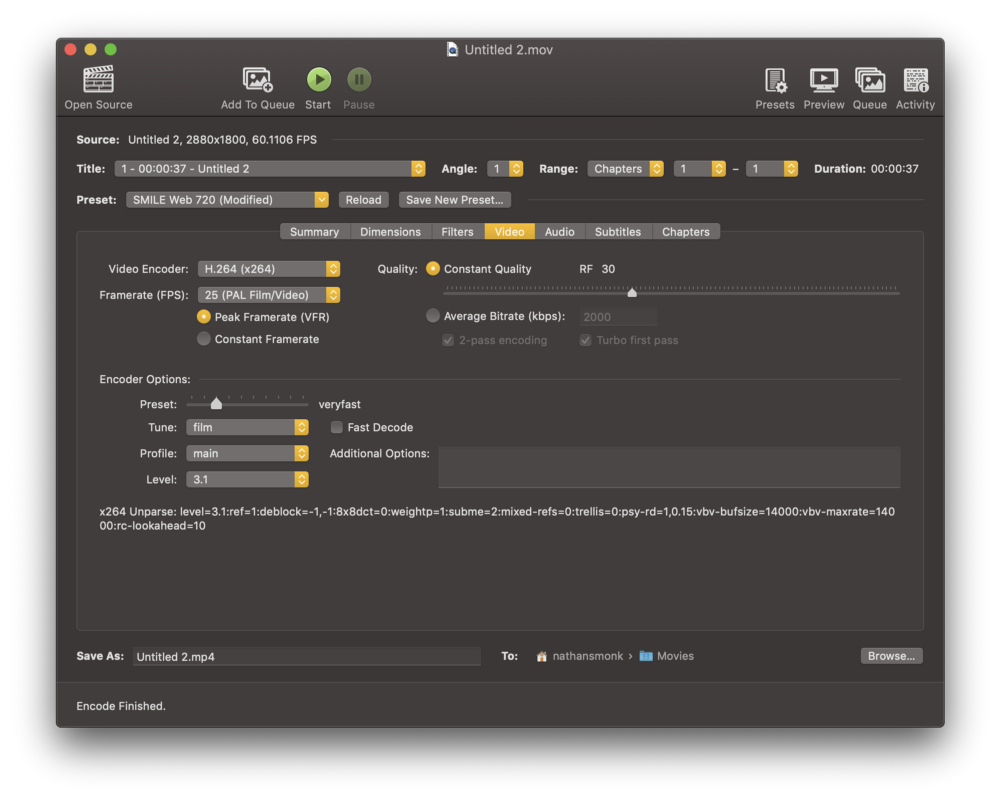
We’re using the popular H.264 encoder with a variable frame rate. This means, if your video has less movement, you’ll get even smaller file sizes. A constant quality set at RF 30 gives us consistent output which means less trial and error for the preset.
There’s a couple of encoder options in there too. I’m not going into those because it’s probably hardware dependant. My machine typically renders in real time or faster. For 10 second clips, you could likely have slower render times and still be doing this super fast.
Step six: Audio
Get rid of it completely. You can’t really use it anyway because most browsers won’t allow you to autoplay a video with sound, and there’s never really been a use case for needing it as a background anyway. Do the same for any subtitles and chapters whilst you’re at it.
Save your preset, run off your first video and BEHOLD — super low file size video that doesn’t look trash!
For Falmouth University, we reduced the video they launched with from ~30mb to under 1.5mb. Pretty spot on for background video usage if I do say so myself — that’s my secret sauce for quick and dirty small video files. And if you don’t fancy setting it up yourself, I’ve gone to the trouble of making the preset available for you to download now.
If you do have some more time and budget and you don’t want to compromise on quality, then you should speak to me about the alternatives.


